Build Visual Studio for Mac Extensions using Github Actions
In my previous article on Extending Visual Studio for Mac 2022, I went through a step-by-step walkthrough to build a simple Visual Studio for Mac extension that does adds a menu item under the Edit menu, which when clicked, will write // Hello at the current cursor position of the currently active document.
Visual Studio for Mac extensions can be created using SDK Style .NET projects use .NET 7.0 as the target framework. The first requirement for setting up a build pipeline is being able to build the project from the command line. Using the example from the the previous article, let’s build the Sample project using a Github Actions workflow
In case you are new to Github Actions, you should create the folder /.github/workflows in your git repo, then create a workflow file under the folder we just created.
For this example, let’s create a file called build.yml.
Here’s the contents of our workflow:
name: Build

on:
  workflow_dispatch:
  push:

env:
  VERSION: 1.0.${{ github.run_number }}

jobs:

  build:

    runs-on: macos-latest
    timeout-minutes: 10

    steps:
    - uses: actions/checkout@v3

    - name: Update Extension Version Info
      run: |
        sed -i -e 's/1.0/${{ env.VERSION }}/g' ./AddinInfo.cs
        cat ./AddinInfo.cs
      working-directory: src

    - name: Restore
      run: dotnet restore
      working-directory: src

    - name: Build
      run: /Applications/Visual\ Studio.app/Contents/MacOS/vstool build --configuration:Release $PWD/Sample.csproj
      working-directory: src

    - name: Pack
      run: /Applications/Visual\ Studio.app/Contents/MacOS/vstool setup pack $PWD/src/bin/Release/net7.0/Sample.dll -d:$PWD

    - name: Archive binaries
      run: zip -r Binaries.zip src/bin/Release/net7.0/

    - name: Publish binaries
      uses: actions/upload-artifact@v2
      with:
        name: Binaries
        path: Binaries.zip

    - name: Rename build output
      run: mv *.mpack Sample-${{ env.VERSION }}.mpack

    - name: Publish artifacts
      uses: actions/upload-artifact@v2
      with:
        name: Extension
        path: Sample-${{ env.VERSION }}.mpack
Let’s break the workflow job steps down into detail…
Step 1) Checkout the branch.
Pretty a much a standard first for most Github Action workflows
Step 2) Update the version info of the extension.
For this naive example let’s just call it version 1.0.xxx where xxx is the workflow run number. We get the Github Action workflow run number from ${{ github.run_number }}. Let’s store this in an environment variable called VERSION. We then want to update the version number in the AddinInfo.cs file
To do this, we use the sed (stream editor) command to replace all instances of 1.0 with 1.0.xxx.
We do this by running:
$ sed -i -e 's/1.0/$/g' ./AddinInfo.cs
The contents of AddinInfo.cs may look something like this:
using Mono.Addins;
using Mono.Addins.Description;

[assembly: Addin(Id = "Sample", Namespace = "Sample", Version = "1.0")]
[assembly: AddinName("My First Extension")]
[assembly: AddinCategory("IDE extensions")]
[assembly: AddinDescription("My first Visual Studio for Mac extension")]
[assembly: AddinAuthor("Christian Resma Helle")]
Step 3) Restore package reference
This simple step is where the workflow should basically just run dotnet restore from the folder that contains the solution file
Step 4) Build the extension
We want to build the project in Release configuration using the CLI. Normally we can do this using dotnet build -c Release which works fine if you have previously built a Visual Studio for mac extension on the machine you’re working on but if you are building it in a new machine that has previously never build a Visual Studio for Mac extension then you most likely will need to run the Visual Studio Tool Runner a.k.a. vstool but because we are probably running from a short lived virtual machine, we can’t assume that running dotnet build -c Release will work on the first try.
Instead of running dotnet build we should instead do something like run the Visual Studio Tool Runner build command
$ /Applications/Visual\ Studio.app/Contents/MacOS/vstool build --configuration:Release $PWD/Sample.csproj
You need to specify the absolute path to the project file, but you can simplify this by getting the present working directory from the PWD command
Step 5) Package the extension
Now that the extension is built, we now need to package it to be able to distribute it. To create a MonoDevelop package file .mpack you need to run the Visual Studio Extension Setup Utility pack command
$ /Applications/Visual\ Studio.app/Contents/MacOS/vstool setup pack [absolute path to main output DLL] -d:[absolute path to output folder]
A little tip for getting the absolute path is to use $PWD. So if you created your project under the ~/projects/my-extension folder and this is currently your working directory then you can do something like:
$ /Applications/Visual\ Studio.app/Contents/MacOS/vstool setup pack $PWD/Sample.dll -d:$PWD
Sample.dll is the build output of the project we just built
The command above will produce the output ~/projects/my-extension/Sample.mpack
Step 5) Package the binaries
Archive the binary files so we can use them as build artifiacts
$ zip -r Binaries.zip src/bin/Release/net7.0/
Step 6) Publish binaries as build artifacts
In this step we will publish the newly created Binaries.zip as a build artifact
Step 7) Rename built output
We do this so to help users who might have download multiple verssions of the extension be able to keep older versions of the extension. This is completely optional, but is something I find to be a good practice
Uploading artifacts uses the actions/upload-artifact@v2 task
Step 8) Publish .mpack file as build artifacts
This is pretty straight forward. You start off by using the actions/upload-artifact@v2 task. This workflow allows the developer to the filename of the artifact, and also which folder to publish as build artifacts
Build Output
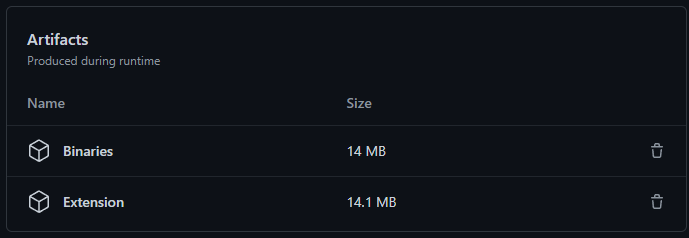
If everything succeeds then we should be able to see the results of the build in Github Actions. At the bottom of the content section for every build should have 2 artifacts, the binary files and the .mpack file itself.
There are 2 artifacts in the build called Binaries and Extensions. They are packed as zip files when downloaded
I hope you found this useful and get inspired to start building extensions of your own. If you’re interested in the full source code then you can grab it here