Extending Visual Studio for Mac 2022
This is step by step walkthrough guide to getting started with developing extensions for Visual Studio for Mac 2022 with explanations, code examples, and a couple of links to offical documentation
The extensibility story for Visual Studio for Mac was almost non-existent for a while, and the documentation for getting started was really outdated. Visual Studio for Mac was originally a re-branding of Xamarin Studio, which was built over MonoDevelop and the extensibility SDK’s we used for the longest time was all from the old MonoDevelop Addin libraries. The original getting started guide from MonoDevelop is still somewhat correct, but the libraries referred to in the guide will no longer build.
For Visual Studio for Mac 2022 this has changed and now we can create Visual Studio for Mac extensions using the Microsoft.VisualStudioMac.Sdk library that we can install from nuget.org. To make things even better, we can now break free of our old .NET Framework 4.x shackles and start targetting .NET 7.0. and all it’s goodness
As of the time I’m writing this, there is still no File -> New -> Extension Project experience, but it’s not hard to get started either.
Walkthrough
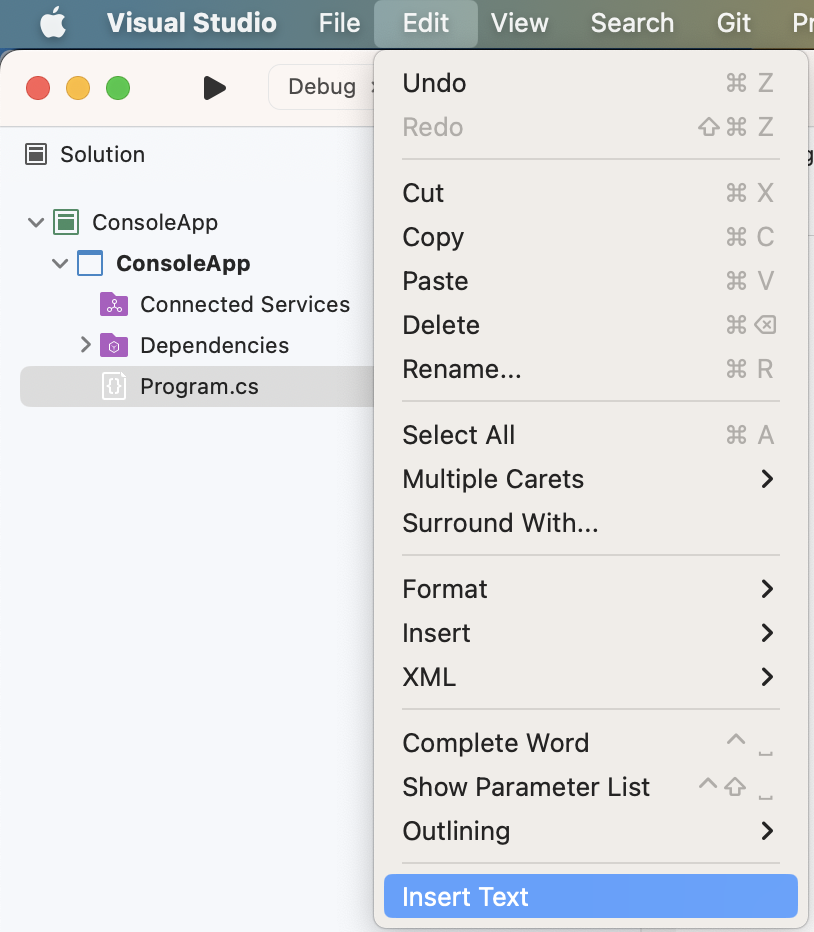
In this walkthrough, we will build a simple Visual Studio for Mac extension that adds the Insert Text menu item to the Edit menu. All this can do is to insert the text // Hello to the active document from the current cursor position
Step 1 - Create New Project
Let’s start with creating a new project called Sample.csproj
Here’s how a csproj file for an empty Visual Studio for Mac extension project looks like:
<Project Sdk="Microsoft.NET.Sdk">
  <PropertyGroup>
    <TargetFramework>net7.0</TargetFramework>
  </PropertyGroup>
  <ItemGroup>
    <PackageReference Include="Microsoft.VisualStudioMac.Sdk" Version="17.0.0" />
  </ItemGroup>
</Project>
Step 2 - Addin info
A Visual Studio for Mac extension has metadata about its name, version, dependencies, etc. It also defines any number of extensions that plug into extension points defined by other extensions, and can also define extension points that other extensions can extend.
Let’s define some AddIn information in a file called AddinInfo.cs
using Mono.Addins;
using Mono.Addins.Description;

[assembly: Addin(Id = "Sample", Namespace = "Sample", Version = "1.0")]
[assembly: AddinName("My First Extension")]
[assembly: AddinCategory("IDE extensions")]
[assembly: AddinDescription("My first Visual Studio for Mac extension")]
[assembly: AddinAuthor("Christian Resma Helle")]
The combined Id and Namespace from Addin should be unique among all Visual Studio for Mac extensions. The other attributes are self-explanatory
Step 3 - Addin Manifest
Now that the Addin is defined, we can add some extensions.
We do this by defining the Manifest.addin.xml file
<?xml version="1.0" encoding="UTF-8"?>
<ExtensionModel>
    <Extension path = "/MonoDevelop/Ide/Commands/Edit">
        <Command id = "Sample.SampleCommands.InsertText"
            _label = "Insert Text"
            defaultHandler = "Sample.InsertTextHandler" />
    </Extension>

    <Extension path = "/MonoDevelop/Ide/MainMenu/Edit">
        <CommandItem id="Sample.SampleCommands.InsertText" />
    </Extension>
</ExtensionModel>
This extension defines a command for the command system. The Command ID should correspond to an enum value. The _label attribute is the display name of the command. The defaultHandler attribute is the full type name of the CommandHandler implementation that will execute when the extension executes
The Command System provides ways to control the availability, visibility and handling of commands depending on context.
Commands can be bound to keyboard shortcuts and can be inserted into menus. In this exaple, we are going to insert the InsertText command into the main Edit menu with another extension.
Step 4 - Implement the CommandHandler
Now that the InsertText command is registered, we need to implement a command handler. The simplest way to use it is with a default handler, which is a class that implements MonoDevelop.Components.Commands.CommandHandler. Let’s implement CommandHandler as InsertTextHandler to be only available when an active document is open
We will also need to create the SampleCommands enum
using MonoDevelop.Components.Commands;
using MonoDevelop.Ide;
using MonoDevelop.Ide.Gui;
using System;

namespace Sample
{
    public class InsertTextHandler : CommandHandler
    {
        protected override void Run()
        {
            var textBuffer = IdeApp.Workbench.ActiveDocument.GetContent<ITextBuffer>();
            var textView = IdeApp.Workbench.ActiveDocument.GetContent<ITextView>();
            textBuffer.Insert(textView.Caret.Position.BufferPosition.Position, "// Hello");
        }

        protected override void Update(CommandInfo info)
        {
            var textBuffer = IdeApp.Workbench.ActiveDocument.GetContent<ITextBuffer>();
            if (textBuffer != null && textBuffer.AsTextContainer() is SourceTextContainer container)
            {
                var document = container.GetTextBuffer();
                if (document != null)
                {
                    info.Enabled = true;
                }
           }
        }
    }

    public enum SampleCommands
    {
        InsertText,
    }
}
Step 5 - Package the extension
This can be done by right clicking on the extension project from Visual Studio for Mac then selecting Pack from the context menu
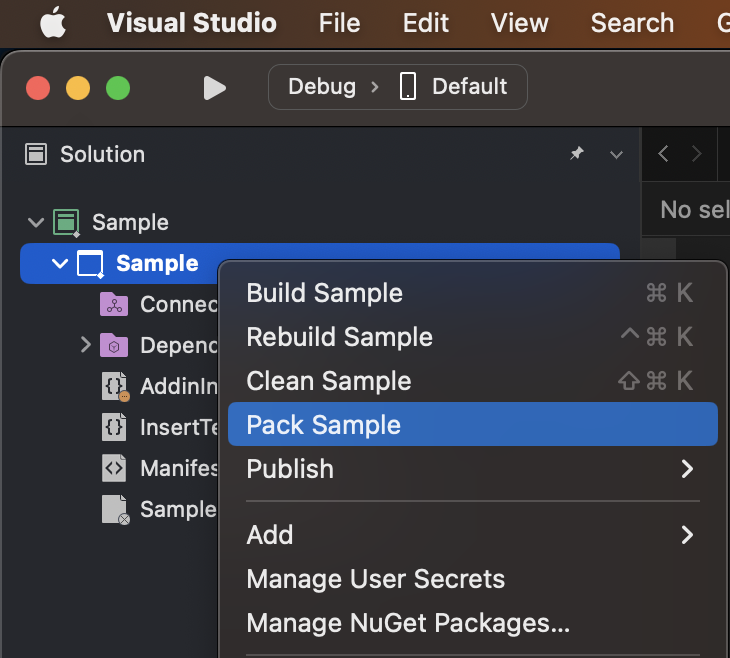
You can also do it from the command line. With the new SDK, Microsoft.VisualStudioMac.Sdk, you can build the project from the command line simply by using dotnet build. Running dotnet build will ONLY build the project, it will not create the distributable .mpack package.
Let’s start with building the project in Release configuration
$ dotnet build -c Release Sample.csproj
This will produce the bin/Release/net7.0/Sample.dll file
To create the .mpack package from the command line, we need to use the Visual Studio Tool Runner a.k.a. vstool. The Visual Studio Tool Runner is included in the Visual Studio for Mac installation. The Visual Studio Tool Runner is available from the following path
$ /Applications/Visual\ Studio.app/Contents/MacOS/vstool
We need to run the Visual Studio Extension Setup Utility pack command
$ /Applications/Visual\ Studio.app/Contents/MacOS/vstool setup pack [absolute path to main output DLL] -d:[absolute path to output folder]
A little tip for getting the absolute path is to use $PWD. So if you created your project under the ~/projects/my-extension folder and this is currently your working directory then you can do something like
$ /Applications/Visual\ Studio.app/Contents/MacOS/vstool setup pack $PWD/Sample.dll -d:$PWD
The command above will produce the output ~/projects/my-extension/Sample.mpack
Step 6 - Test the extension
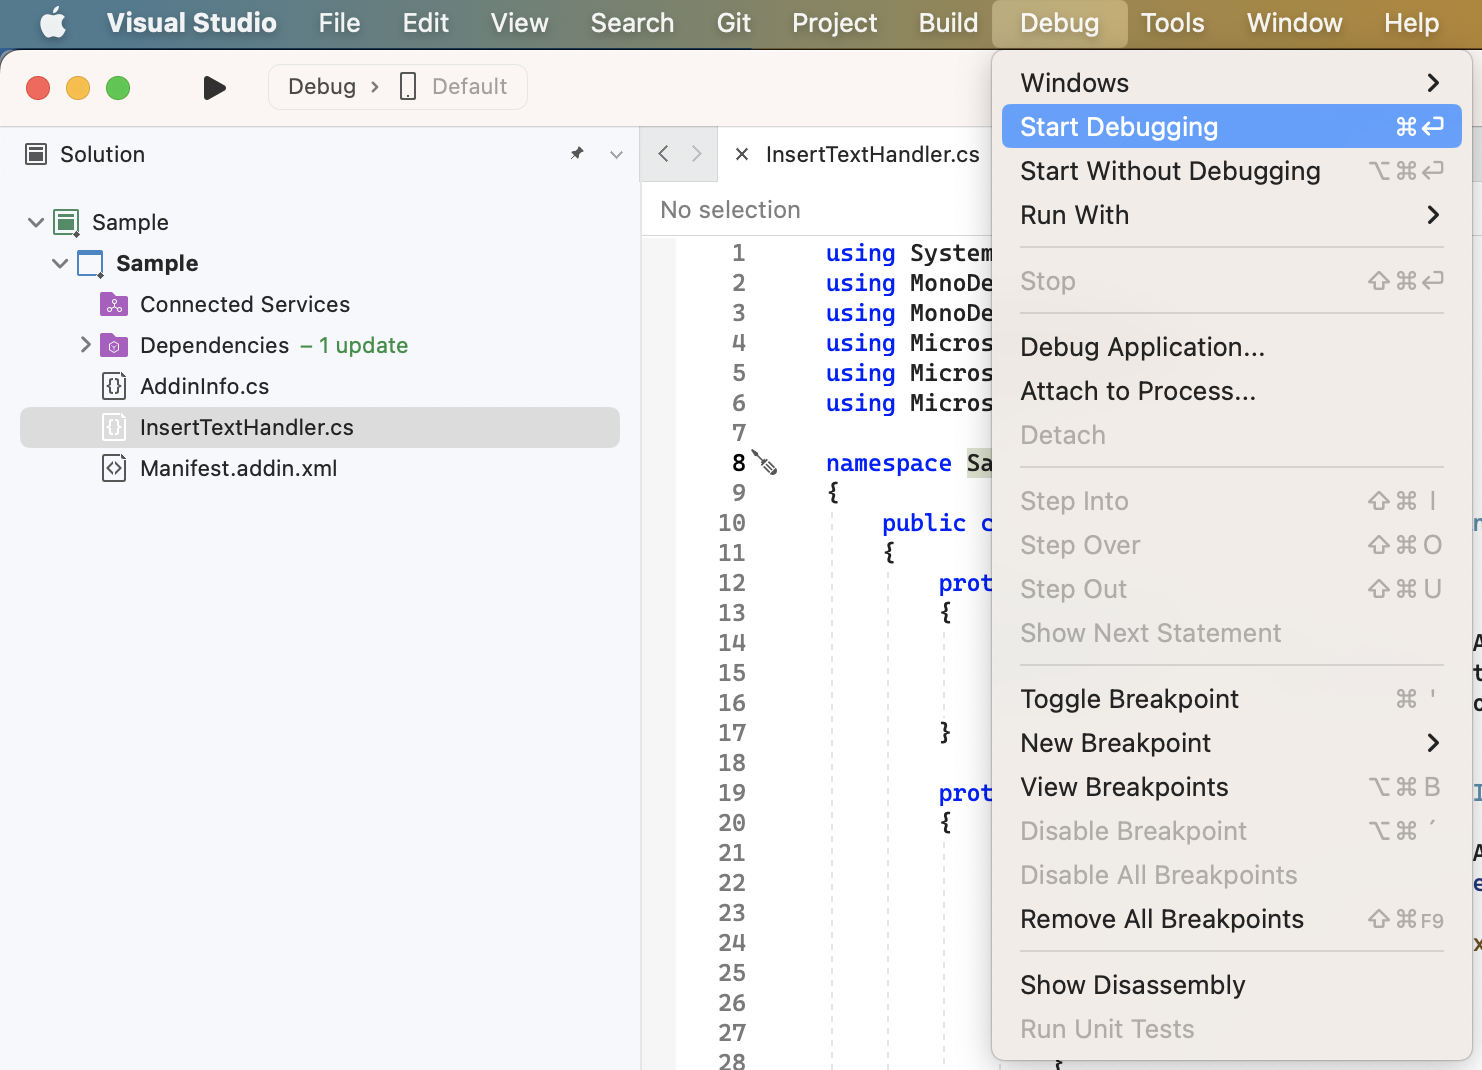
Debugging a Visual Studio for Mac is possible, but doesn’t come out of the box. To enable Debugging the extension from Visual Studio for Mac we need to add the following to our C# project
<PropertyGroup Condition=" '$(RunConfiguration)' == 'Default' ">
  <StartAction>Program</StartAction>
  <StartProgram>\Applications\Visual Studio.app\Contents\MacOS\VisualStudio</StartProgram>
  <StartArguments>--no-redirect</StartArguments>
  <ExternalConsole>true</ExternalConsole>
</PropertyGroup>
Now our Sample project should look something like this:
<Project Sdk="Microsoft.NET.Sdk">
  <PropertyGroup>
    <TargetFramework>net7.0</TargetFramework>
  </PropertyGroup>
  <PropertyGroup Condition=" '$(RunConfiguration)' == 'Default' ">
    <StartAction>Program</StartAction>
    <StartProgram>\Applications\Visual Studio.app\Contents\MacOS\VisualStudio</StartProgram>
    <StartArguments>--no-redirect</StartArguments>
    <ExternalConsole>true</ExternalConsole>
  </PropertyGroup>
  <ItemGroup>
    <PackageReference Include="Microsoft.VisualStudioMac.Sdk" Version="17.0.0" />
  </ItemGroup>
</Project>
Debugging the extension will basically start another instance of Visual Studio for Mac where you can test your extension
Try it out and if all goes well the Edit menu should have the Insert Text item at the bottom
Step 7 - Install extension
If you followed Step 5, then you should already have a .mpack at hand. To install a Visual Studio for Mac extension, you need to follow these steps:
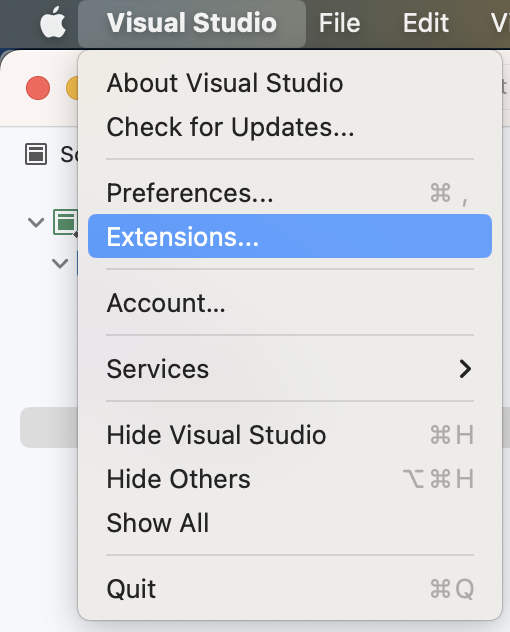
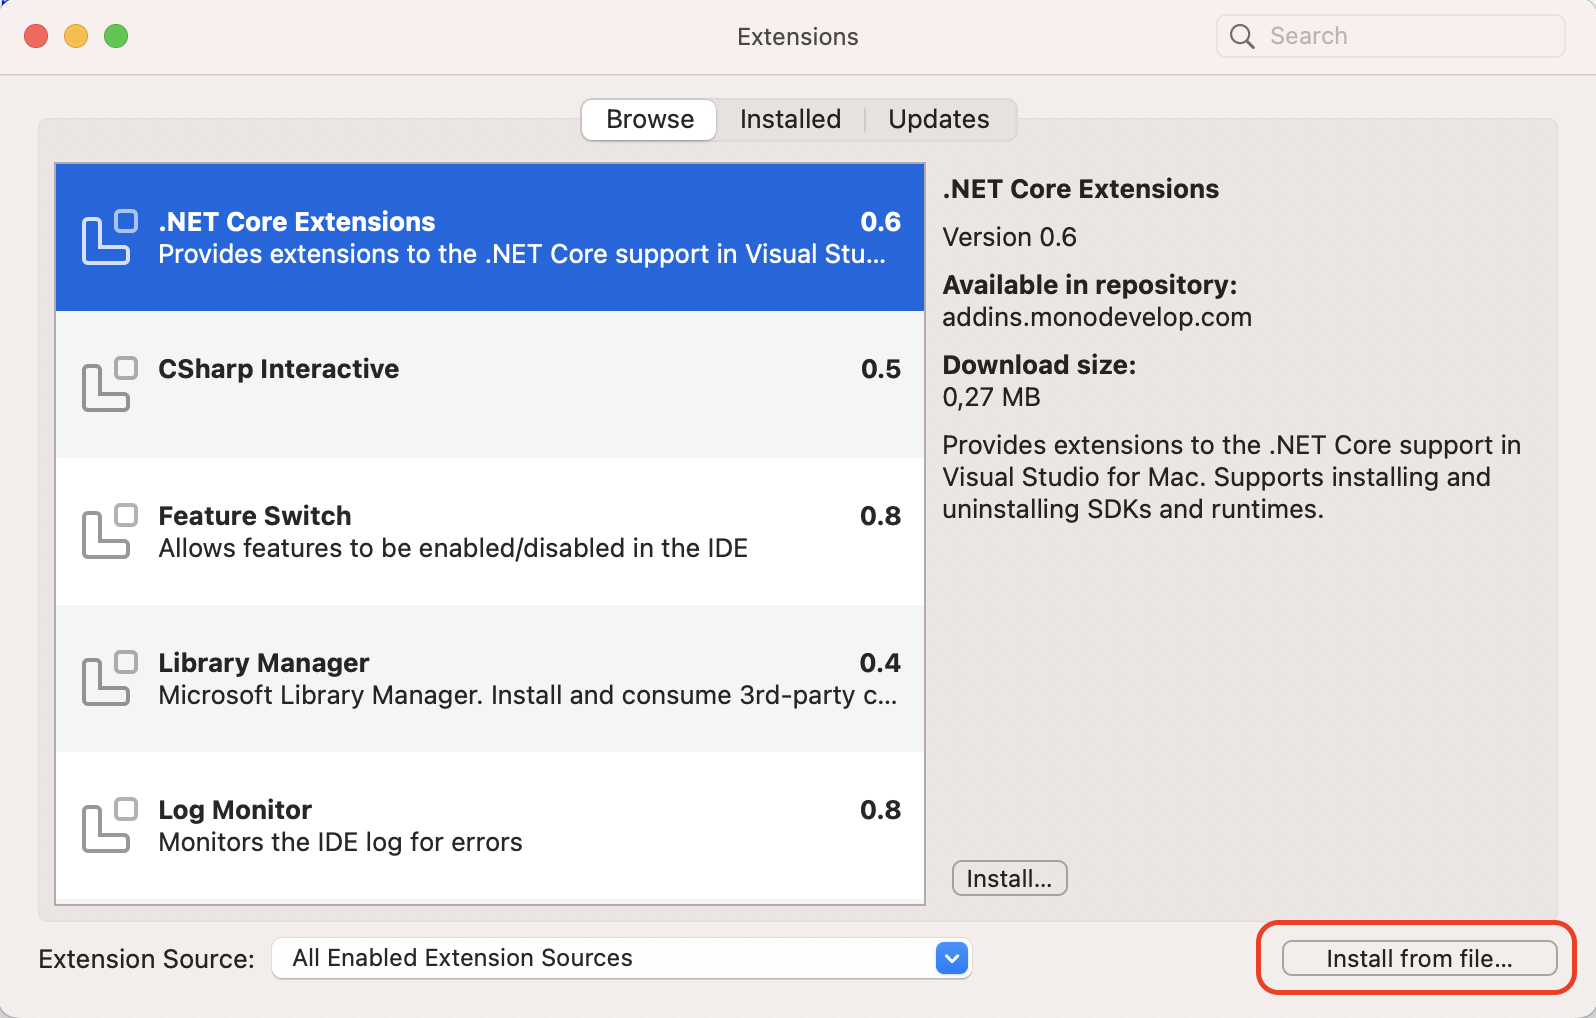
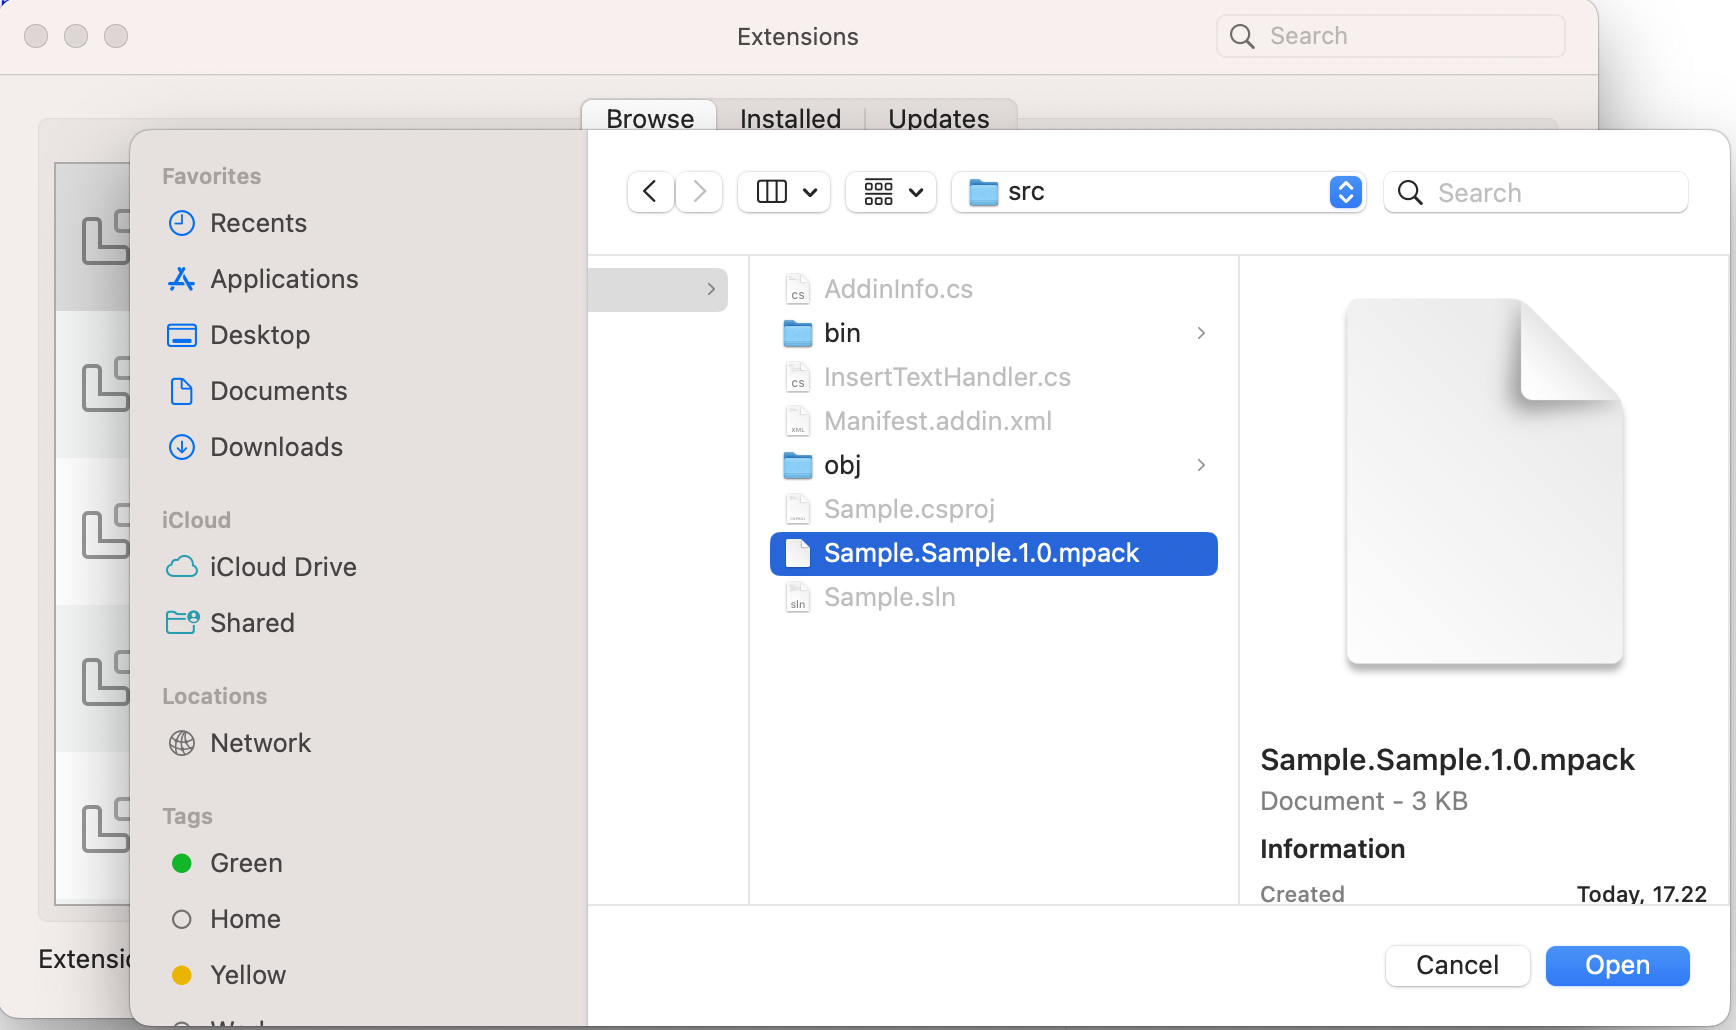
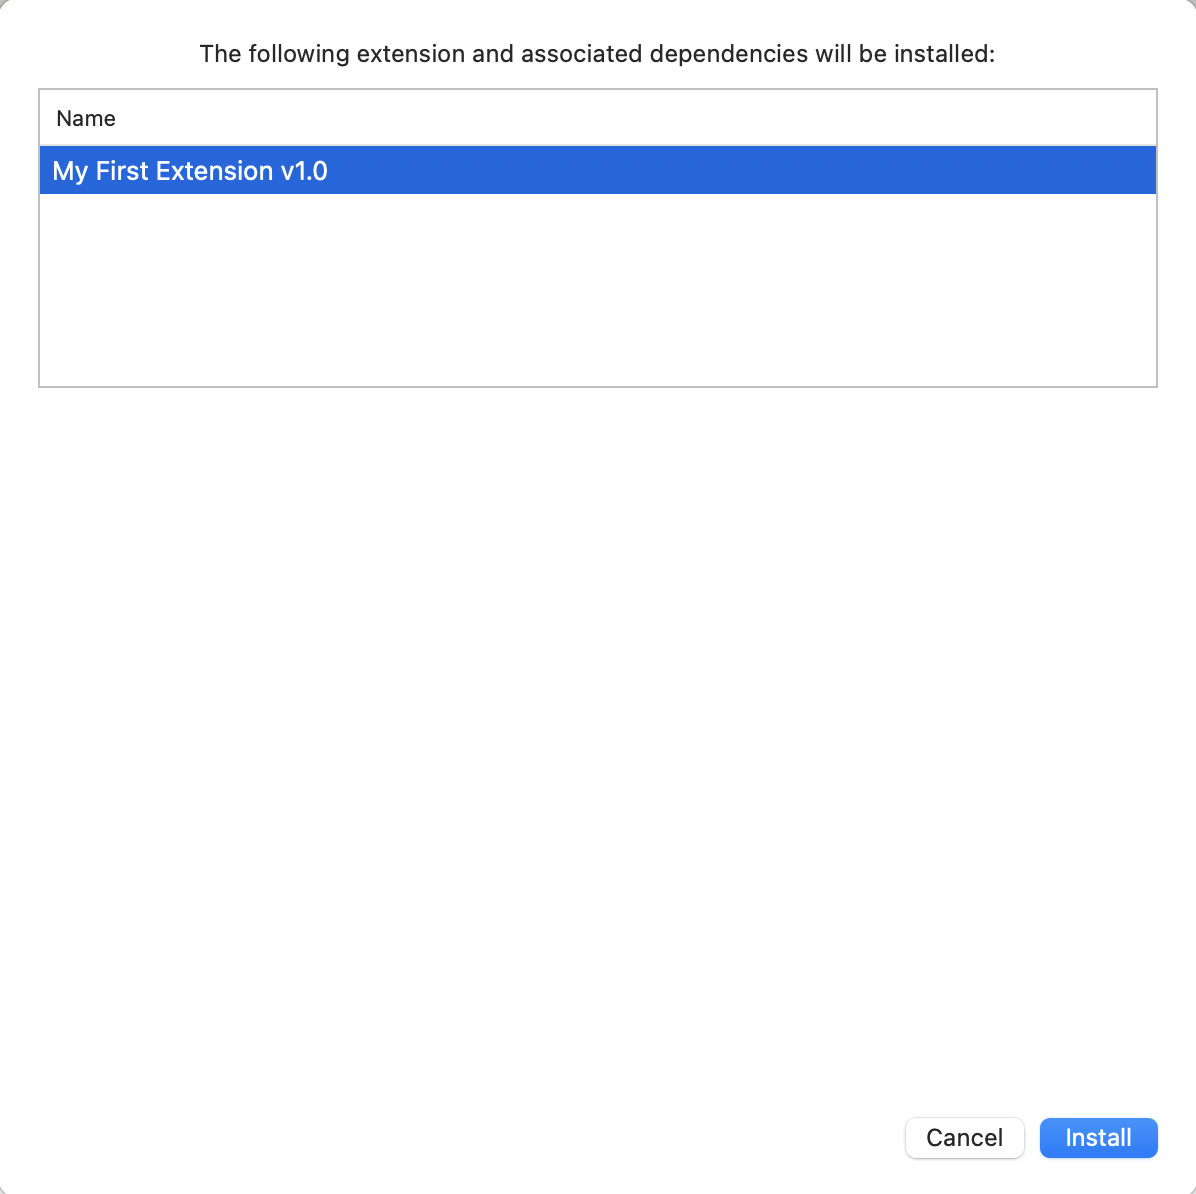
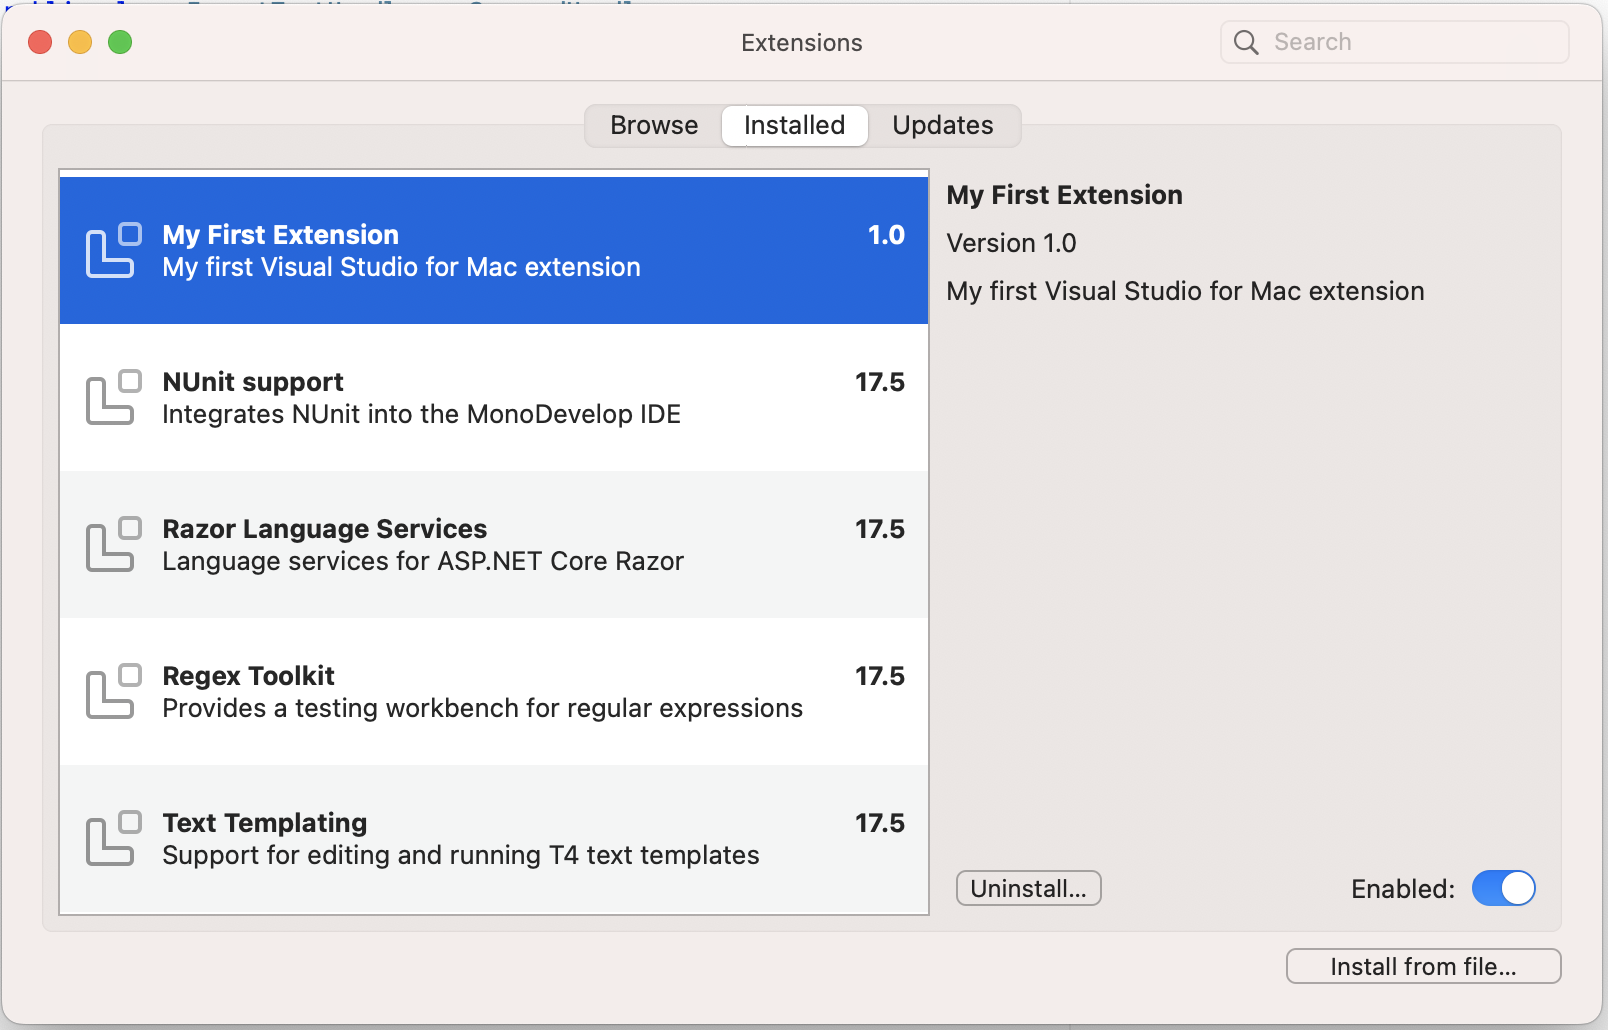
You need to restart Visual Studio for Mac at this point before you can see our new extension under the Edit menu

I hope you found this useful and get inspired to start building extensions of your own. If you’re interested in the full source code then you can grab it here