Modernizing REST API Client Code Generator with the New Visual Studio Extensibility Model
I recently rebuilt the REST API Client Code Generator extension for Visual Studio from the ground up using the new Visual Studio.Extensibility model. This migration allowed the extension to run out-of-process and leverage the full power of .NET 8.0. In this post, I’ll walk through the architectural changes, the challenges of the old model, and how the new extensibility API simplifies modern extension development.
The source code for the new extension is available on GitHub.
The Evolution of an Extension
The original version of this extension (source code available on GitHub) was built using the traditional Visual Studio SDK. It served its purpose well, but as with any software built on older frameworks, it began to show its age.
The “Dependency Hell” of In-Process Extensions
One of the most significant pain points with the old Visual Studio SDK is that extensions run in-process with Visual Studio. This means your extension shares the same memory space and dependencies as the IDE itself.
A classic example of this is Newtonsoft.Json. If your extension depends on version 13.0.1, but Visual Studio has loaded version 12.0.3 for its own internal use, you enter “Dependency Hell”. You’re forced to use binding redirects, assembly loading hacks, or simply hope for the best.
By moving to the new out-of-process extensibility model, the extension runs in its own isolated process. This architecture provides several key benefits:
- True Isolation: The extension runs on .NET 8.0, completely independent of the .NET Framework 4.8 runtime that powers Visual Studio.
- No More Binding Redirects: I can use any version of any library I want—including
System.Text.Jsonor newer versions ofNewtonsoft.Json—without clashing with Visual Studio’s dependencies. - Improved Stability: If the extension crashes, it doesn’t take down the entire IDE with it.
From “Custom Tools” to Explicit Commands
In the previous version, the extension relied on the Single File Generator (or “Custom Tool”) mechanism. This is a legacy feature where you select a file in Solution Explorer, go to the Properties window, and type a magic string like RefitterCodeGenerator into the “Custom Tool” field.
While this felt “integrated,” it had significant drawbacks:
- Discoverability: Users had to know the magic string to type.
- Silent Failures: If the generation failed, it was often difficult to see why without digging into the Output window.
- Blocking the UI: The generation happened on the UI thread, freezing Visual Studio for large API specifications.
The new extension abandons this pattern in favor of explicit context menu commands. You now simply right-click an OpenAPI file and select “Generate Client Code”.
Architecture Comparison: Entry Points
The difference in how the extension is initialized is striking. The old model used the AsyncPackage class, decorated with a multitude of attributes to register menus, tool windows, and options pages.
Old VSPackage Entry Point - VsPackage.cs:
[Guid("47AFE4E1-5A52-4FE1-8CA7-EDB8310BDA4A")]
[ProvideMenuResource("Menus.ctmenu", 1)]
[ProvideUIContextRule(...)]
[ProvideOptionPage(typeof(GeneralOptionPage), VsixName, GeneralOptionPage.Name, 0, 0, true)]
public sealed class VsPackage : AsyncPackage
{
    private readonly ICommandInitializer[] commands = {
        new AutoRestCodeGeneratorCustomToolSetter(),
        new NSwagCodeGeneratorCustomToolSetter(),
        // ...
    };

    protected override async Task InitializeAsync(
        CancellationToken cancellationToken,
        IProgress<ServiceProgressData> progress)
    {
        await JoinableTaskFactory.SwitchToMainThreadAsync(cancellationToken);
        await base.InitializeAsync(cancellationToken, progress);

        foreach (var command in commands)
            await command.InitializeAsync(this, cancellationToken);
    }
}
The new model uses a cleaner, more modern approach. The entry point inherits from Extension, and we use Dependency Injection right out of the box.
New Extension Entry Point - ExtensionEntrypoint.cs:
[VisualStudioContribution]
internal class ExtensionEntrypoint : Extension
{
    public override ExtensionConfiguration ExtensionConfiguration => new()
    {
        Metadata = new(
            id: "f7530eb1-1ce9-46ac-8fab-165b68cf3d61",
            version: ExtensionAssemblyVersion,
            displayName: "REST API Client Code Generator (PREVIEW)",
            description: "Generate REST API client code from OpenAPI/Swagger specifications")
    };

    [VisualStudioContribution]
    public static MenuConfiguration GenerateMenu => new("%ApiClientCodeGenerator.GroupDisplayName%")
    {
        Placements = [KnownPlacements.ItemNode],
        Children = [
            MenuChild.Command<Commands.GenerateRefitterCommand>(),
            MenuChild.Command<Commands.GenerateNSwagCommand>(),
            // ...
        ],
    };

    protected override void InitializeServices(IServiceCollection serviceCollection)
    {
        serviceCollection.AddSingleton<ExtensionSettingsProvider>();
        base.InitializeServices(serviceCollection);
    }
}
Notice how we can register services like ExtensionSettingsProvider using standard .NET dependency injection patterns (InitializeServices).
Modernizing Commands and Async Execution
One of the biggest improvements in the new model is that everything is async by default. In the old SDK, you had to carefully manage thread switching to avoid “UI delays” or deadlocks. The original version of the extension uses single file generators as a custom tool. A custom tool is a COM component that implements the IVsSingleFileGenerator interface. Implementing single-file generators in 2026 feels really outdated.
Old Command Implementation - SingleFileCodeGenerator.cs:
[ComVisible(true)]
public abstract class SingleFileCodeGenerator : IVsSingleFileGenerator
{
    public int Generate(
        string wszInputFilePath,
        string bstrInputFileContents,
        string wszDefaultNamespace,
        IntPtr[] rgbOutputFileContents,
        out uint pcbOutput,
        IVsGeneratorProgress pGenerateProgress)
    {
        // Strict thread affinity check required
        if (!TestingUtility.IsRunningFromUnitTest)
            ThreadHelper.ThrowIfNotOnUIThread();

        // Blocking generation on the UI thread
        var codeGenerator = Factory.Create(...);
        var code = codeGenerator.GenerateCode();

        // Report progress
    }
}
In the new model, we simply implement ExecuteCommandAsync and use the IClientContext to interact with the IDE.
New Command Implementation (RefitterCommands.cs):
[VisualStudioContribution]
public class GenerateRefitterCommand(TraceSource traceSource, ExtensionSettingsProvider settingsProvider)
    : GenerateRefitterBaseCommand(traceSource, settingsProvider)
{
    public override async Task ExecuteCommandAsync(
        IClientContext context,
        CancellationToken cancellationToken)
    {
        // Fully async execution without UI thread blocking
        await GenerateCodeAsync(
            await context.GetInputFileAsync(cancellationToken),
            await context.GetDefaultNamespaceAsync(cancellationToken),
            cancellationToken);
    }
}
Background Progress Reporting
Since our code generation can take a few seconds (or more for large specs), providing feedback is essential. The new SDK makes it incredibly easy to show a progress indicator in the Visual Studio status bar or a background task window.
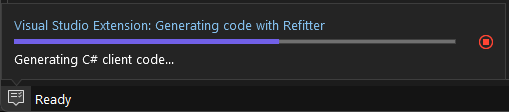
Here’s how easy it is to implement:
public async Task GenerateCodeAsync(...)
{
    using var progress = await Extensibility.Shell().StartProgressReportingAsync(
        "Generating code with Refitter",
        new ProgressReporterOptions(true), // true = indeterminate/cancellable
        cancellationToken);

    progress.Report(10, $"Starting Refitter code generation for: {inputFilename}");

    // Do the heavy lifting...
    var csharpCode = await GenerateCodeInternalAsync(..., progress, cancellationToken);

    progress.Report(90, "Writing generated code...");
    await File.WriteAllTextAsync(outputFile, csharpCode, cancellationToken);
}
A New Settings Experience
The old Visual Studio SDK used the DialogPage class to create options pages, which often looked like standard Windows Forms property grids. The new model introduces a modern, declarative way to define settings.
Here’s an example of how settings are defined in the new model. We simply define a static class with properties decorated with the [VisualStudioContribution] attribute:
internal static class GeneralSettings
{
    [VisualStudioContribution]
    internal static SettingCategory GeneralCategory { get; } = new("general", "%Settings.General.DisplayName%", SettingsRoot.RootCategory)
    {
        Description = "%Settings.General.Description%",
        GenerateObserverClass = true,
        Order = 0,
    };

    [VisualStudioContribution]
    internal static Setting.String JavaPath { get; } = new(
        "javaPath",
        "%Settings.JavaPath.DisplayName%",
        GeneralCategory,
        string.Empty)
    {
        Description = "%Settings.JavaPath.Description%",
    };

    // ... other settings
}
Reading these settings is also straightforward and fully asynchronous:
public class ExtensionSettingsProvider(VisualStudioExtensibility extensibility)
{
    public async Task<IGeneralOptions> GetGeneralOptionsAsync(CancellationToken cancellationToken)
    {
        var values = await extensibility.Settings().ReadEffectiveValuesAsync(
        [
            GeneralSettings.JavaPath,
            GeneralSettings.NpmPath,
            GeneralSettings.NSwagPath,
            // ...
        ],
        cancellationToken);

        return new GeneralOptions(values);
    }
}
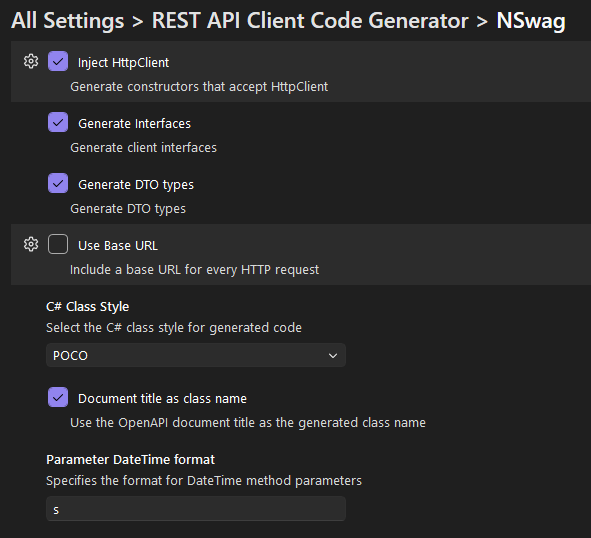
I’ve migrated all the tool-specific settings to this new API. Here is what the new settings UI looks like:
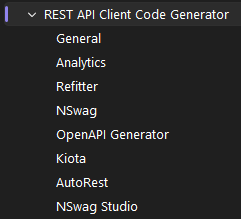
We can now define settings for each generator, such as NSwag, AutoRest, and Refitter, with rich UI support.
Dialogs and User Input
Sometimes we need input from the user, like a URL for an OpenAPI specification. In the old days, I would have had to build a custom WPF Window or Windows Form. Now, I can use the built-in ShowPromptAsync method for a consistent, native look and feel.
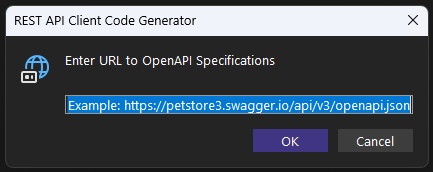
This snippet from CommandExtensions.cs shows how we prompt for a URL:
public static async Task<string?> AddNewOpenApiFileAsync(
    this Command command,
    IClientContext context,
    CancellationToken cancellationToken)
{
    var inputUrl = await command.Extensibility.Shell().ShowPromptAsync(
        "Enter URL to OpenAPI Specifications",
        new InputPromptOptions
        {
            DefaultText = "Example: https://petstore3.swagger.io/api/v3/openapi.json",
            Icon = ImageMoniker.KnownValues.URLInputBox,
            Title = "REST API Client Code Generator",
        },
        cancellationToken);

    return inputUrl;
}
Creating Custom Dialogs with XAML
For more complex scenarios, like the About Dialog, the new model allows us to define UI using standard XAML data templates. This is a huge win for maintainability, as we can separate the UI definition from the logic.
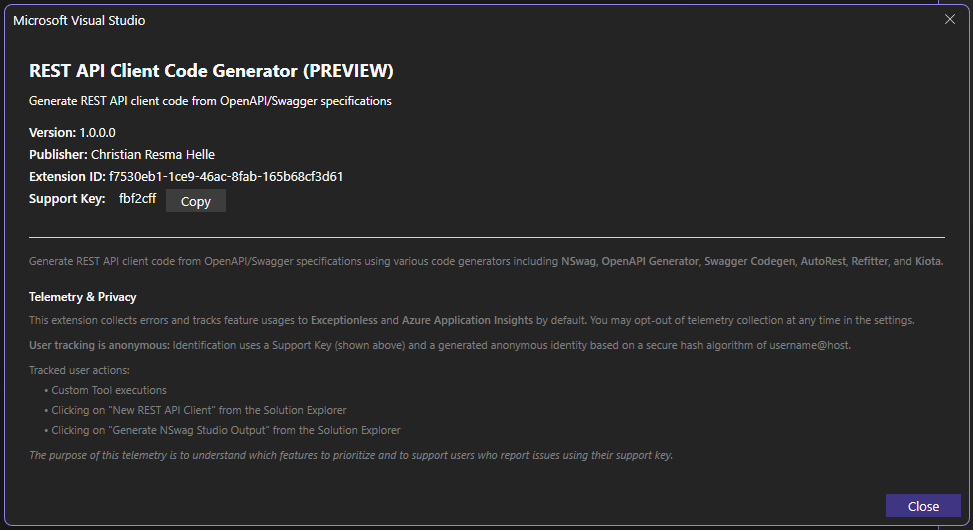
Here’s a snippet of the XAML definition for the About Dialog:
<DataTemplate xmlns="http://schemas.microsoft.com/winfx/2006/xaml/presentation"
              xmlns:x="http://schemas.microsoft.com/winfx/2006/xaml"
              xmlns:vs="http://schemas.microsoft.com/visualstudio/extensibility/2022/xaml">
  <StackPanel Orientation="Vertical" MinWidth="500" Margin="20">
    <TextBlock FontSize="18" FontWeight="Bold" Margin="0,0,0,10"
               Text="{Binding DisplayName}" />

    <TextBlock FontSize="12" Margin="0,0,0,5"
               Text="{Binding Description}" TextWrapping="Wrap" />

    <StackPanel Orientation="Horizontal" Margin="0,10,0,5">
      <TextBlock FontWeight="SemiBold" Text="Version: " />
      <TextBlock Text="{Binding Version}" />
    </StackPanel>

    <!-- ... more UI elements ... -->
  </StackPanel>
</DataTemplate>
And the backing C# model uses the RemoteUserControl base class:
internal class AboutDialog(
    VisualStudioExtensibility extensibility,
    string displayName,
    string description,
    string version)
    : RemoteUserControl(new AboutDialogData(extensibility, displayName, description, version))
{
    [DataContract]
    internal class AboutDialogData : NotifyPropertyChangedObject
    {
        [DataMember]
        public string DisplayName { get; set; }

        [DataMember]
        public string Description { get; set; }

        [DataMember]
        public string Version { get; set; }

        // ...
    }
}
This clean separation of concerns makes building custom UI in Visual Studio extensions much more pleasant.
Code Reuse: The Core Library
Despite the massive architectural shift in the VSIX project, the “brains” of the operation—the code generation logic—remain largely unchanged.
Both the old (Dev17) and new (Extensibility) projects reference the same Core Library. This ensures that regardless of which version of the extension you use, the generated code quality and features remain identical. This made the migration much smoother, as I only had to focus on the “plumbing” of the extension rather than rewriting the generators themselves.
Conclusion
Migrating to the new Visual Studio Extensibility model has been a significant step forward. The performance gains from .NET 8.0, the stability of the out-of-process model, and the improved developer experience with modern APIs make it well worth the effort.
If you’re a Visual Studio extension author, I highly recommend looking into this new model. And if you’re a user of the REST API Client Code Generator, I hope you enjoy the faster, more stable experience!
This extension builds on years of OpenAPI tooling work. For related approaches to API client generation, see my posts on Kiota and Refitter, both of which offer alternative code generation strategies from OpenAPI specs.